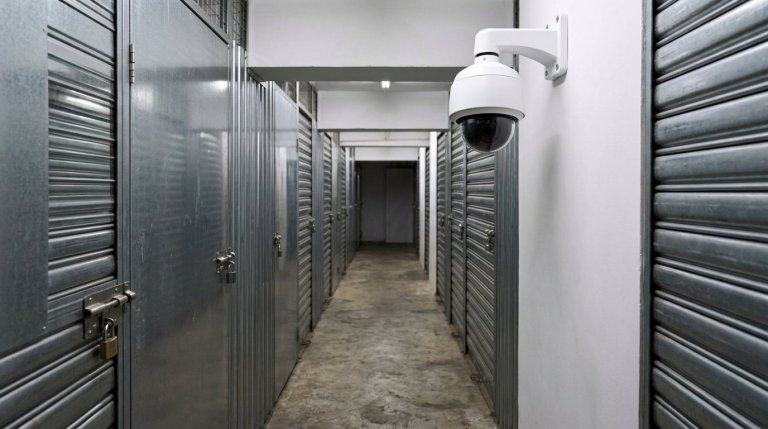

During the plastering and tiling phase of your renovation, you will need to store your belongings temporarily. First, select a suitable storage unit based on the quantity and size of your items, then take note of security arrangements, contract terms and access procedures.You should also prepare an inventory list and pack your furniture and boxes securely. The following section explains how to estimate the space required, arrange for storage and collection, and make the necessary preparations before storage.
Key points of the article
- Estimate the storage space required based on the quantity and dimensions of your furniture, boxes and large items to avoid running out of space or booking a unit that is too large.
- Take note of the warehouse’s air-conditioning, CCTV surveillance and access control arrangements, and familiarise yourself with how your belongings will be managed whilst in storage.
- Plan the order of drop-off and collection in advance, and place items you may need during the renovation in easily accessible locations.
- Before signing the contract, carefully review the terms regarding the tenancy period, renewal, early termination and access to the storage facility to ensure clarity regarding your storage arrangements.
- Sort, label and pack your items according to your inventory list, then use a space calculator to estimate the space required.
1. Using a storage unit to temporarily store belongings during renovation work
Plastering work generates dust and takes up living space in your home. Start by sorting your belongings into three categories: ‘to keep at home’, ‘not needed during the works’ and ‘no longer required’.Winter clothing, spare bedding and small electrical appliances can be included on the list of items for temporary storage; whilst everyday items such as crockery, medicines and chargers should be kept to hand. When selecting a storage unit for miscellaneous items during the plastering phase of your renovation, this categorised list will help you estimate the volume of your belongings and avoid having to unpack essentials after they have been boxed up.
When estimating storage space, do not just count the number of boxes; also measure the length, width and height of large pieces of furniture. Two-seater sofas, bed frames and dining tables usually take up a significant amount of space, so you should note down their dimensions first before arranging the boxes.As a rough guide, approximately 12 square feet can accommodate a two-seater sofa and several suitcases. If you also have a mattress, bookcases or multiple boxes of clothing, these must be factored in; do not base your storage space requirements solely on the sofa example.
When packing, sort boxes by room and purpose; for example, place living room furnishings in one box and bathroom items in another.Write the room name, contents and ‘first to be retrieved’ or ‘last to be retrieved’ on the outside of each box; this will make it much easier to find items later. Systematic packing can increase storage space utilisation by over 30 per cent. Placing heavier items in smaller boxes and lighter clothing in larger ones also makes stacking and handling easier.
Keep the weight of each box under control. The recommended weight limit for standard shipping boxes is 20 kg; heavy items such as books and crockery should not be concentrated in a single box.Before sealing a box, check the base and then secure the opening with adhesive tape; fragile items such as glass cups and photo frames should be wrapped individually and labelled on the outside of the box. Any detachable parts of furniture should be stored together, whilst screws and fittings should be placed in a bag and labelled with the name of the furniture to prevent them from going missing once the work is complete.
Finally, organise the order in which items will be retrieved according to the renovation schedule. Cleaning tools or replacement supplies may still be needed before the plastering work is complete; these items should be placed in boxes that are easy to access and not buried behind large pieces of furniture.Take a photograph of the inventory list for your records and make a note of the label on each box; should you need to retrieve an electric fan or clothing during the works, you will be able to locate them using your records without having to search through every box.When arranging a suitable temporary storage facility for miscellaneous items during the plastering and tiling phase, cross-check the list against the dimensions of large items and the number of boxes to ensure the storage layout meets your actual needs.
2. Warehouse Temperature, Humidity and Security
Just because your belongings are out of the house during renovation does not mean you can overlook the storage environment. Dust from plastering work can settle on furniture surfaces, whilst dampness may affect cardboard boxes, clothing and wooden items.When selecting a temporary storage facility for items during the plastering phase of a renovation, it is advisable to first check whether the facility is air-conditioned and how security is managed; these address different issues, as an air-conditioned environment does not guarantee complete protection from dust or control over the humidity of every individual item.
Before storing clothes, bed linen and books, ensure they are completely dry, then place them in sealed storage bags or boxes. Do not pack damp cloths, cleaning products or damp clothes into boxes, as this can easily lead to moisture build-up inside.For wooden cupboards and dining tables, wipe away surface dust first and allow them to dry thoroughly before wrapping them; when wrapping furniture in breathable protective material, ensure there is no residual moisture before packing. These preparations help minimise direct contact with external dust whilst the items are in storage.
Cardboard boxes should be sealed securely, with the contents and room clearly labelled on the outside, for example, ‘bedroom bedding’ or ‘living room books’. If you need to retrieve bed linen before the renovation is complete, clear labelling will be far more convenient than having to unpack several boxes to search for it one by one.Wooden furniture can be fitted with a protective layer, whilst glass surfaces should be wrapped in suitable cushioning material; heavy items and fragile items should be stored separately to prevent them from crushing one another when stacked.
In terms of security, find out whether the storage facility has CCTV surveillance and access control, and clarify how access cards are activated and who is responsible for keeping them.Once the storage unit has been rented and the access card activated, tenants may access their unit 24 hours a day. Whilst this arrangement allows you to retrieve items as your renovation progresses, the access card should still be kept securely by the designated user to prevent it from being mixed up with other items or handed over to anyone who does not need to enter the storage facility.
Make separate arrangements for valuable or important items. Identity documents, essential medication and electronic devices used on a daily basis are generally not suitable for placing in boxes that will need to be retrieved at a later date; if storage is absolutely necessary, first ensure that the items inside the box are properly packed and label the boxes clearly.You may also take photographs of the exterior of your furniture and the labels on your boxes before storage, to facilitate future verification of the condition and location of your belongings.
When selecting a temporary storage facility for clutter during the plastering phase of a renovation, compare the air-conditioned environment, CCTV coverage and access control arrangements item by item, and ensure items are packed to protect against dust and damp according to their type. If you are arranging storage during a renovation, familiarise yourself with the warehouse environment and access arrangements first, then plan the order of collection based on your inventory list.
3. Storage Drop-off and Collection Procedures
Before plastering work commences, plan your storage arrangements by working backwards from the start date of the works. You may arrange for items to be stored 3 to 5 days before work begins, allowing time to sort items, clear access routes and deal with any last-minute changes. If tradespeople need to remove large pieces of furniture first, confirm the sequence of works before deciding which items to remove from the property.Do not wait until the day work begins to organise your belongings, otherwise tools, furniture and building materials are likely to end up crammed together.
Before moving items into storage, cross-check the inventory list against the actual items one by one. Make a note of the number of boxes, the names of furniture items and any items that need to be retrieved first, such as work documents, seasonal clothing or cleaning supplies. Then, place the boxes with the labels facing outwards, organised into ‘first to retrieve’ and ‘last to retrieve’ zones.Arrange large pieces of furniture first, then neatly stack the boxes alongside them, leaving a clear access route to avoid having to move the sofa or bed frame every time you need to retrieve a box.
On the day of storage, start by handling the larger pieces of furniture, followed by the sealed boxes.For flat-pack furniture such as bed frames, gather all screws and fittings together and label them to indicate which parts they belong to. Ensure all cardboard boxes are securely sealed, and place fragile items where they will not be crushed by heavier objects. Once everything has been arranged, make a note of where each category of item is located; for example, place bedding near the entrance and spare books further back.
If you need to retrieve items during the renovation, first locate the box labels using the inventory list, then move the minimum number of items required.After retrieving an electric fan or clothing, return the other boxes to their original positions to keep passageways clear. If the renovation schedule changes, update the list accordingly to indicate items that have been retrieved, are still in storage, and are yet to be collected, to avoid mistakenly assuming items are missing upon completion.
Before collecting your belongings from storage, ensure that all construction debris and dust have been cleared from your home and that the furniture has been arranged as required. Check each box against the list, then remove large items of furniture first, followed by cardboard boxes, to minimise the need for repeated handling of items.If the works are delayed, you should contact your customer service representative 3 to 5 days before the end of the original rental period to arrange an extension of the storage period. Once the works are complete, inspect the furniture and boxes one by one before unpacking everyday items; this makes it easier to spot any damage to the packaging and allows you to place items directly back into their designated rooms.

4. Terms of the Storage Contract
Before signing the contract, carefully check the storage unit details, the start and end dates of the tenancy, and the arrangements for renewal.Generally, the minimum rental period for a self-storage unit is one month. If plastering work is likely to take longer, pay attention to how the contract handles situations where items have not been collected by the end of the rental period. Make a note of the expected date of storage and the completion date, then cross-check these against the dates specified in the contract to avoid mistaking the construction period for the actual storage period.
Secondly, confirm the procedures for early termination and lease extensions. The contract may specify the method of notification, the required documentation and the effective date; for example, if you have arranged to collect your furniture early, you should also understand when you need to give notice to ensure it is processed in accordance with the procedure.In the event of construction delays, you should know how to apply for an extension, whether the tenancy period needs to be reconfirmed, and what arrangements will be made if this is not processed in time. Keep a record of the relevant clauses and correspondence; this will make it easier to trace the agreements between both parties in the future.
Access arrangements must also be clearly set out. Check who is authorised to use the access card, what to do if it is lost, and the areas to which the tenant has access. If family members or the person in charge of the refurbishment need to collect items on your behalf, confirm in advance the contract’s requirements regarding authorised persons and identity verification.Do not rely solely on verbal instructions; record authorised users and their contact details in accordance with the regulations to minimise the risk of being unable to access the storage facility upon arrival.
The contract will usually also specify requirements for stored items, conduct within the storage facility and liability arrangements. Before signing, read through each clause carefully to check the categories of items prohibited from storage, the procedures for handling damaged items, and the respective responsibilities of the tenant and the storage facility. If the terms mention fire, flooding or other accidents, pay attention to the notification procedures and required records.Take photographs of your furniture before storing it and keep an inventory list; these can serve as a basis for future verification.
We recommend that you check the following details item by item before signing, and keep the answers alongside your copy of the contract:
- The start and end dates of the tenancy, the procedure for renewing the tenancy and the notice period.
- Procedures for early termination of the tenancy, construction delays and late collection of items.
- Scope of access card use, authorised persons and procedures for handling lost cards.
- Permitted items for storage, scope of liability and the procedure for reporting accidents.
Finally, check whether any verbal commitments have been included in the contract or any annexes. If the terms on paper differ from any recorded communications, clarify which version takes precedence before signing. As renovation dates, tenancy periods and collection arrangements are subject to change, retaining the most up-to-date version will ensure you can organise both storage and collection based on a single set of details.
5. Inventory List and Preparations
Before storing your belongings, draw up an itemised list; do not simply write ‘a batch of miscellaneous items’. You may categorise items by living room, bedroom or kitchen, then note down the name of each item, its quantity and the box number. For example: ‘Bedroom, one bedside lamp, box number B3’.For furniture, also note the dimensions, any parts that need to be dismantled and the condition. This way, when you collect your belongings, you can locate items using the list rather than having to search through every box.
Each box must have a fixed number, and the same numbers should be used on the list. Write a summary of the contents and the order of priority for retrieval on the outside of each box, for example: ‘A1, winter clothes, retrieve later’; ‘A2, file folders, retrieve first’.Do not simply write ‘clothes’ or ‘books’, as items of the same type may be divided across multiple boxes. If there are fragile items such as glass cups or photo frames, indicate this directly on the label and note the box’s storage location.
Check the condition of items before storing them. Clothes, bed linen and towels must be completely dry; kitchenware must be cleaned and left to air-dry; and the surfaces of wooden furniture must be wiped clean. If items are damp or stained, deal with them before packing to avoid sealing the problem inside the box.For electrical appliances, make a note of the brand, model and the location of any accessories; for example, a detached remote control can be placed in the same labelled bag as the appliance.
Photographs can supplement written records. Before packing, take photos of the exterior of furniture, the model labels on electrical appliances and the contents of each box, then name the photos according to the box number.If a single photograph shows multiple items, the inventory list should specify the location of each one. Keep a hard copy of the list in a fixed location at home and save a digital copy on your mobile phone; both records will come in handy should you need to retrieve items during the renovation.
The list should also indicate which items cannot be stored away for long periods.Essential medicines, identity documents, work computers and chargers used daily should be kept in an easily accessible place and not mixed in with the boxes to be stored. If you still need to use a vacuum cleaner or cleaning supplies during the works, be sure to list these in advance under the ‘Access during works’ section. This step will prevent you from having to unpack boxes at short notice, which could disrupt the organised storage layout.
Finally, cross-check the physical items against the list, then group them into ‘furniture’, ‘boxes’, ‘fragile items’ and ‘priority access’. Whenever items are added or removed, update the box number, quantity and location accordingly; for example, if you retrieve a box of bed linen, mark it as ‘retrieved’ in the records.Once the list is finalised, plan your storage arrangements according to the inventory, providing a clear basis for estimating storage space and future retrievals.
Lucky Storage
Lucky Storage can help you organise your belongings more efficiently whilst your home is being refurbished.Do you already have a list of furniture and boxes but are unsure how much space you’ll need? The space calculator can estimate the required storage space based on your inventory, allowing you to organise your information first before planning your storage arrangements. When entering details, record bed frames, sofas and boxes separately; be sure to specify the quantity of each type of item so that the estimate more accurately reflects your actual needs.
Before you start your estimate, note down the length, width and height of each large piece of furniture, then list the number of boxes and their intended use. For example, the living room sofa, bedroom bed frames and packed clothes should be organised separately.If the renovation is still in the planning stage, you can categorise the list into ‘must be stored temporarily’ and ‘will be accessed during the works’. The clearer the information, the easier it is to identify which items will take up the most space, and the simpler it is to adjust the storage sequence.
Renovations not only affect furniture placement but may also make working from home inconvenient. If you need to maintain your work arrangements during the works, you may wish to explore mini-office options. Lucky Storage provides information on mini-offices in San Po Kong, Kwun Tong, Tsuen Wan and Kwai Chung.You can explore options in different areas based on your usual place of work and space requirements; this is suitable for those needing a dedicated workspace, rather than as an alternative to storing furniture.
When organising your belongings, start by adding items you won’t use daily to your storage list, then mark the boxes you’ll need to retrieve first. Items such as frequently used documents, computer accessories or cleaning supplies required during the renovation should be clearly labelled to avoid realising you need them only after they’ve been put into storage.The estimates from the space calculator can serve as a starting point for your planning; you can also collate your inventory list, furniture dimensions and the duration of the renovation works to facilitate an assessment of your space requirements based on your actual arrangements.
If your list is still subject to change, you can organise your existing items first and then add any new or retrieved items later. Keeping the dimensions of large furniture, the number of boxes and the order in which items need to be accessed in a single record will make communication much clearer.Lucky Storage’s Space Calculator and Mini Office resources cater to storage space estimation and work scheduling respectively; you can choose the option that best suits your current needs. Please feel free to contact Lucky Storage to discuss your inventory list and renovation plans.
Taking your renovation plans to the next stage
Once the renovation dates are finalised, you’ll need to adjust the layout of your home accordingly. Start by aligning your project timetable with your inventory list to plan the sequence for moving furniture out, carrying out the work and rearranging everything. By organising temporary storage for clutter during the plastering and tiling phases, you’ll not only free up space but also align with the project schedule, minimising the need to move items back and forth.
If you haven’t finalised your inventory yet, start by listing large pieces of furniture and items you must keep to hand. The Lucky Storage team can help you organise your space planning according to your storage needs, making the next steps clearer.Please contact Lucky Storage to enquire and discuss storage solutions that suit your renovation plans. By being well-prepared, you can enjoy a more relaxed lifestyle whilst the works are underway.