
The handover date for your new home may not coincide with the progress of the renovation works; temporary storage of your furniture can be arranged to cover any gaps in the schedule. As the minimum rental period for self-storage units is generally one month, should the works be delayed, it is advisable to arrange an extension three to five days before the original rental period expires.This guide to furniture storage during renovation in Hong Kong explains how to coordinate short-term storage, allow time for lease extensions, and ensure your furniture is properly packed to protect it from dust and impact.
You may have already scheduled your moving-in and renovation start dates, yet you may still be concerned about project delays, having nowhere to store your furniture, or the risk of scratches and damage during transport. The following section will outline the key arrangements step by step, covering the handover gap, renovation progress and packing preparations, to help you plan your temporary storage with greater peace of mind.
Contents Index
- Short-term storage during the gap between moving out and moving in
- Extending Storage Tenancy in the Event of Renovation Delays
- Temporary Storage and Dust- and Impact-Resistant Packaging for Furniture During Renovation
- Lucky Storage
- Frequently Asked Questions
Key Points
- First, compare the handover date of your old home, the move-in date of your new home and the start date of the renovation works to estimate the gap during which your furniture will need to be stored.
- The minimum rental period for a self-storage unit is generally one month; when arranging a short-term lease, be sure to factor in the time required for moving your furniture in and out.
- If there is a risk of delays to the renovation work, make arrangements to extend the tenancy 3 to 5 days before the original lease expires to avoid the collection date clashing with the progress of the works.
- Before storing your belongings, organise an inventory and measure their dimensions, separating items that are prone to scratches, breakage or are particularly large, to make it easier to estimate the space required and arrange their placement.
- Ensure your furniture is properly packed to protect against dust and knocks, and label items in advance to indicate their original room locations; this will make collection and re-arrangement much smoother later on.
Short-term storage during the gap between tenancies when moving house
When you need to vacate your old home but cannot yet move into your new one, your furniture will be stuck in limbo between these two dates.Start by noting the handover date of your old home, the handover date of your new home and the completion date of the renovation on the same calendar, then identify the period when you’ll have nowhere to store your belongings. When planning recommended solutions for temporary furniture storage during renovations in Hong Kong, you can first assess your storage needs based on the time gap between these dates.For example, if you are vacating your old home at the end of the month but cannot move into your new home until the middle of next month, you will need to arrange temporary storage for your furniture in advance. With the dates clearly laid out, it is easier to decide whether to store the entire lot of furniture or just the large items.
When estimating the storage period, do not focus solely on the handover dates for the two properties.Moving out, cleaning, handing over the keys and organising your new home may all cause the actual move-in date to be delayed. Start by using the earliest date on which you can hand over your furniture as the starting point, and the confirmed date for delivery to your new home as the end point, taking note of the gap between the two.If your new home is still undergoing renovation, factor in the time required for the work to be completed and for the interior to be ready for furniture. If you plan too tightly, you may find yourself in a situation where your furniture has been moved out but your new home is not yet ready.
The minimum rental period for a self-storage unit is generally one month. Even if you expect to store items for only a few weeks, you should plan for the full rental period first, and then compare whether storing items in a self-storage unit is more feasible than leaving them at your old home. The rental period should be calculated based on the actual start date of the tenancy and the expected collection date; it is not advisable to estimate simply by how many months the period ‘spans’.Please record the start of the tenancy, the expected collection date and any necessary buffer time separately, to avoid mistaking the removal date for the start of the tenancy.
The items you intend to store will also affect the space required.Start by listing bed frames, mattresses, wardrobes, sofas, dining tables and electrical appliances, then note down their dimensions or approximate volume. Next, divide them into three categories: items needed before moving into the new home, furniture that won’t be used for the time being, and items that do not need to be stored.For example, clothing and daily essentials that you will still need during the transition period can be arranged separately from large items of furniture; old items that do not need to be taken to the new home need not take up storage space. The clearer the list, the easier it is to estimate the space required.
When choosing a storage unit, first consider the order in which you will collect your items. If, for instance, you can move your mattress into your new home first but will have to wait until the fitting-out work is complete before bringing in your wardrobe, ensure that these two items can be retrieved separately with ease.Place items you’ll need sooner at the top of your list, and label each piece of large furniture with the room and item name, such as ‘bedroom wardrobe’ or ‘living room sofa’. These labels will save you from having to unpack each box one by one when retrieving items, and will also make it easier to organise them in batches according to the rooms in your new home.
Before packing, take photographs of the exterior of the furniture, paying particular attention to any existing scratches, loose parts and the positioning of glass panels. Place any removed screws, shelf supports and fittings into separate, sealed bags, then label each bag with the name of the corresponding item.If bed frames and dining tables can be dismantled, label each component as belonging to the same set; for sofas or cupboards that cannot be dismantled, empty the drawers and cupboard compartments first. These steps make it easier to take stock of your belongings and reduce the risk of parts getting mixed up during reassembly.
Finally, draw up two lists: one for the move-in and one for the move-back. The move-in list should detail the items, quantities, dimensions and packaging condition; the move-back list should be organised by room in your new home and indicate which items are to be collected first or last.If you have large electrical appliances, fragile glassware or items that cannot be laid flat, you should also note any placement requirements on the lists. When arranging recommended temporary furniture storage in Hong Kong, this information will help you organise a plan based on available space and the sequence of handover.Should there be any changes to the handover date, update the estimated collection dates and storage lists to ensure that short-term storage aligns with the tenancy handover, rather than having to find a place to store your furniture at short notice.

Extend the storage rental period in the event of renovation delays
Should the renovation progress slow down, the date for retrieving your furniture will need to be adjusted accordingly. If the original completion date changes, first finalise the latest works schedule before adjusting the estimated collection date. To extend the storage period, you should contact your customer service representative 3 to 5 days before the original rental period expires.Do not wait until the very last day to deal with this, as it can easily lead to rushed arrangements for both lease renewal and collection. When planning a temporary storage solution for your furniture, you should also factor the possibility of construction delays into your schedule.
First, identify at which stage the delay is occurring. Paint that has not dried, unfinished flooring work, or fixed furniture that has not yet been installed may all affect the sequence in which large items of furniture can be brought into the property.Compare the latest progress of the building works against the original collection dates item by item. If a bed frame cannot yet be placed in the bedroom, it is not advisable to arrange for the entire batch of furniture to be returned simply because the living room is complete. It is more practical to revise the collection plan in batches according to which rooms are ready for use.
Before extending the storage period, ensure you have all the necessary information ready. This includes the original lease expiry date, the estimated new collection date, an inventory of stored items, and a list of items that need to remain in storage.Even if you only need to store some items for longer, indicate this on the list – for example, retaining wardrobes and bed frames whilst retrieving the dining table, which can be placed immediately. The more complete the information, the easier it will be to explain your actual needs when discussing the lease extension arrangements, and it will also prevent items that have already been collected from being included in subsequent arrangements.
The extension period can be determined in stages based on the progress of the building works. If only one room remains unfinished, first confirm when furniture can be placed in that room, then arrange the order in which the relevant items are collected; if work is still ongoing throughout the entire property, base your planning on when large items of furniture can be installed.Do not confuse ‘completion of works’ with ‘readiness to move in furniture’. Cleaning, clearing access routes and interior layout will also affect the actual dates for collecting items.
Whenever there is a change in progress, update the same record. You can use a simple table to list the works items, their current status, the affected items and the estimated collection times.For example, if the living room flooring is delayed, note that the sofa and dining table still need to be stored; if the bedroom is ready for use, include the bed frame in the group to be collected earlier. This approach allows the terms of the lease extension to follow the actual changes in the items, rather than simply extending a vague overall deadline.
When making contact, clearly state whether you are extending the entire rental period or adjusting the collection arrangements for specific items. Provide details of the original rental period and the updated dates, and make a note of the agreed arrangements for future reference. If there are still uncertainties regarding the renovation, you may arrange matters based on the current progress of the works and update the details once new information is received.The key is to request an extension 3 to 5 days before the tenancy expires, rather than waiting until the furniture cannot be collected as originally planned before making contact. When considering relevant storage arrangements, you should also factor this contact window into your own renovation schedule.
Finally, double-check your collection list and packing labels. During the renovation extension, items may be collected in batches; if labels simply say ‘miscellaneous’, it will be difficult to identify them quickly.Instead, use specific names such as ‘kitchen small appliances’ or ‘bedroom bed frame accessories’, and list items still in storage as a separate group. If the markings on the boxes are no longer legible, update them to ensure a more organised collection process.By keeping the new dates, items and project status in a single record, you can minimise the confusion caused by repeated organisation.
Temporary Storage of Furniture and Dust/Impact-Proof Packaging During Renovation
Before renovation work begins, organise the furniture that needs to be moved. Arrange for it to be transported to storage at least 3 to 5 days before the work starts, so that the clearance schedule aligns with the construction dates.You can also use this time to empty cupboards and drawers, dismantle any removable parts, and label each item. If furniture remains on site, it will be more difficult to carry out painting, sanding or demolition work in designated areas.
Clean the surfaces before packing. Wipe away dust from cabinet fronts, table tops and chair legs with a dry cloth, then check that there is no moisture or cleaning product residue.If wooden furniture is wrapped whilst still damp, moisture can easily become trapped inside the packaging; therefore, allow the surfaces to dry completely before applying dust protection. Sofas and mattresses should also be checked for crevices and any debris removed before wrapping.
Different items should be handled separately. Sofas, mattresses and upholstered chairs can be covered with suitable dust covers; for cupboards and dining tables, protect the exposed surfaces and corners first.Glass doors, mirrors or glass table tops should first be covered with a soft material, then protected on the outside with stiff cardboard, and clearly labelled as ‘fragile’. The packaging should fit snugly around the item, but do not pull the protective layer too tightly, to avoid compressing any protruding parts.
The risk of impact is usually concentrated on the four corners, handles and table legs. Wrap protruding parts in soft padding or bubble wrap first, then cover them with cardboard to minimise direct impact during handling.Screws, shelf supports and removed door handles should be placed in separate small bags, each labelled with the name of the piece of furniture. Labels such as ‘dining table screws’ or ‘wardrobe shelf supports’ are easier to identify than simply writing ‘parts’.
Do not stick adhesive tape directly onto wooden surfaces, leather or fabric. Adhesive residue may be difficult to remove and could damage the surface. Instead, stick the tape onto the packing material, ensuring the seal is positioned where it will not rub against the furniture.To protect drawers or cupboard doors, secure them with soft straps first, then wrap them in protective material; do not use straps that are too tight, as they may damage the panels or handles. Once each piece of furniture is ready, check the corners, base and seams to ensure there are no exposed areas.
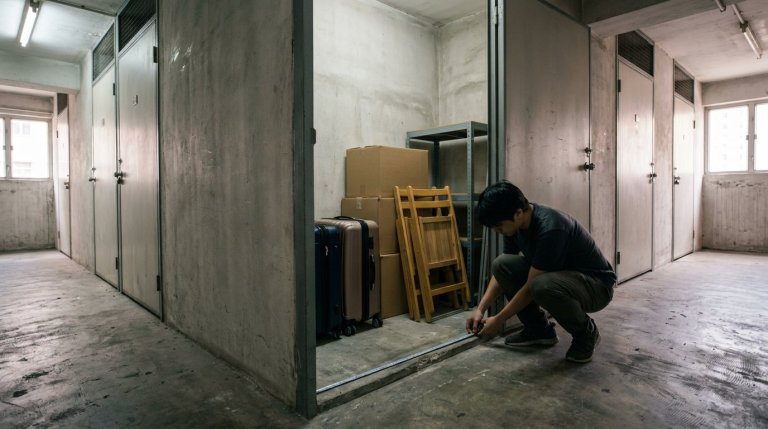
Before storing items in the warehouse, take photographs of them and record the condition of the packaging. Photographs should include the front and sides of the furniture, as well as any existing scratches; the inventory list should detail the name of the item, the quantity and any removed parts.For example, a wardrobe can be divided into the main body, shelves and a bag of fittings, all clearly labelled as belonging to the same item. The contents and the intended room should also be written on the outside of the cardboard boxes to facilitate retrieval in batches—such as for the bedroom, living room or kitchen—once the renovation is complete.
Finally, organise the packing labels according to the order in which items will be retrieved. Mark items to be moved back earlier with ‘Retrieve First’; for furniture still to be stored, indicate the intended room and the name of the item.If the renovation work is not yet complete, first wrap dust-sensitive fabrics and bedding securely, then check the quantities against your inventory list. Once these preparations are complete, you can work backwards from the start date of the renovation to plan your move-in, allowing at least 3 to 5 days before work begins for storage.
Lucky Storage
If you have already compiled a list of your furniture, Lucky Storage’s space calculator can estimate the storage space required based on your inventory, making it easier for you to coordinate with handover dates and the progress of your renovation. If you also require workspace during the renovation, a mini-office is another option to consider.Start by organising your items by type, size and estimated storage duration, then plan according to your actual needs. Please feel free to contact Lucky Storage to find out which storage solution best suits your requirements.
Frequently Asked Questions
Once I’ve rented a self-storage unit, when can I access it?
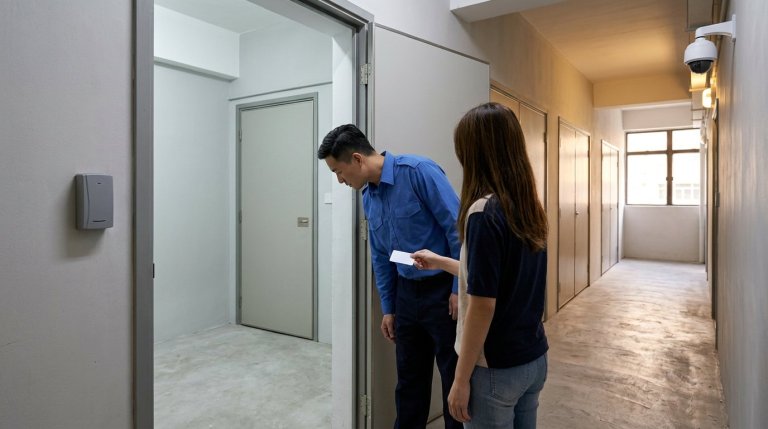
Once you have rented a unit and activated your access card, you can access your unit 24 hours a day. This is ideal if you need to collect or drop off items in batches to suit your renovation schedule.
How do I estimate how much storage space I need?
First, compile a list of your furniture and belongings, then use the size calculator to estimate the space required. Specifying the types and quantities of items will ensure your estimate more accurately reflects what you’ll actually be storing.
Is the storage facility air-conditioned?
The self-storage facility is air-conditioned and equipped with CCTV surveillance and access control security. Before storing your items, you should still wrap your furniture properly and organise your inventory list and labels to facilitate future identification.